
QUARTER 2
NOTE: All Photoshop projects should be saved as a JPG with a resolution of 75 dpi unless otherwise noted.
Advanced Painting Techniques
Project 17 - Face Painting
For this project, you will need to open an image of your own face. (Be sure that you are looking straight ahead in the photo. Copies of many of your face pictures have been shared with you in Google Drive for our course). Next you will need to download an image of a flag representing where you were born (it may be either a flag representing either the state or the country where you were born. Be sure that you download an image that is in "large" format. A tutorial for how to complete the project is shown here. Save as Project 17 in jpg format and then upload into your shared Digital Graphics folder for grading.
Project 18 - Water Color Painting
For this project, you will need to open an image you have taken with your iPad. Size the image to be 4" x 6" in landscape orientation with a resolution of 100. Apply the watercolor artistic filter. You will want to experiment with the brush detail, shadow intensity and texture values to get the best outcome for your project. Save as Project 18 in jpg format and then upload into your shared Digital Graphics folder for grading.
Summative 6 - Master Painter
Females in class - Download this painting of Mona Lisa and save it to your desktop. Males in class - download this painting of Thomas Jefferson. Next take a selfie which has you looking in the same direction and at approximately the same angle as the painting you just downloaded of Mona Lisa or Thomas Jefferson. Follow this tutorial to replace Mona Lisa or Thomas Jefferson's face with your own. Be sure to adjust the color, opacity, contrast, etc. of your face layer to match that shown in the painting. Next flatten your image and apply any texture found within the painting to your face. Save as Summative 6 in jpg format and then upload into your shared Digital Graphics folder for grading.
Advanced Transformation and Animation Techniques
Project 19 - Warp Text
For this project, you will be typing both your first and last name (as different layers) and then using the Warp Text tool to manipulate the shape of your text. Your completed project should have either a red, green, or blue background and a contrasting color used for your text. Steps to create your project will be found here. Save as Project 19 in jpg format upload into your shared Digital Graphics folder for grading.
Project 20 - Puppet
Watch this brief tutorial on how to do the Puppet Warp feature and then use these skills to make either your left or arm bend into a different direction in your photo. For this project, have a classmate take a full body photo of you with your iPad. You will need to have both of your arms extended as if you were reaching toward 3 and 9 o'clock. Have them email you the photo and then open it up in Photoshop. Create a new file with a white background and then copy only your face and body from your photo and paste onto this one background layer. You are now ready to complete the steps shown in the video. Once completed, save as Project 20 in jpg format and then upload into your shared Digital Graphics folder for grading.
Project 21 - Speaker
Follow the steps that Mr. Hunter demonstrated to create a vibrating stereo speaker. Save this file and open it in Photoshop. When completed, select File, Save for Web & Devices, leave as a GIF and save as project 21 and be sure to select "images" not "html and images" and then upload into your shared Digital Graphics folder for grading.
Project 22 - Holiday Greeting Card with Liquify
Use Photoshop to open a face image of yourself. (You should be looking directly at the camera). The image should be 5" wide x 7" tall. You will be using the liquify effect to turn yourself into a holiday elf - give yourself pointed ears (if your ears show in the photo), large eyes, a pointed chin, and any other liquify effect of your choice. Save and then add a Christmas or other holiday-related hat to the top of your head. Add an appropropriate holiday greeting to the front and save as project 22 in jpg format and then upload into your shared Digital Graphics folder for grading.
Summative 7- Buzzing Around
Download this field of tulips and open it up with Photoshop. Next download this bee image and open it up in Photoshop. Copy the bee image and paste it to location 1 shown below. You will be using the animation window to move the bee to different portions of the tulip image based on your grade here at school.
Gr 12: Have the bee move from 1 to 2 to 3 to 1
Gr 11: Have the bee move from 1 to 3 to 4 to 1
Gr 10: Have the bee move from 1 to 4 to 1 to 2
Gr 9: Have the bee move from 1 to 4 to 2 to 3
Use the following timings when moving to these numbered flowers: 1 =.01 sec 2 = .02 sec 3 = .02 sec 4 = .02 sec
Be sure to select the file to loop forever. Save for Web & Devices as Summative 7 and then upload into your shared Digital Graphics folder for grading.
Editing Video
Project 23 - Making You A Star (optional challenge project)
This project will require that you be logged into your computer to use the Apple operating system (Not Windows). For this project, you will use your ipad to record 5 seconds of video footage walking between room 326 toward 351. You should avoid filming when anyone else is in the hallway and be sure to be quiet during filming. Send yourself the video footage (or open it from your Cloud account if you have images and video backed up there). Next you will need to have a classmate take a full body shot of yourself standing against a blank wall in the hallway to make it easier for the greenscreen process to work in iMovie. Send your full body shot to yourself and open it in Photoshop. Select the background (including the wall, ceiling, and floor and remove them with the magic eraser. (You will end up having a gray and white checkerboard appearing). Fill the checkerboard background with either green (R=0, G=255, B=0) or blue (R=0, G=0, B=255). Save your full body image to the computer so that you may import it into your video clip in iMovie. The iMovie tutorial demonstrating how to do this project is found here. Save your completed video as project 23 (from within iMovie - medium quality) and then upload into your shared Digital Graphics folder for grading.
Project 24 - is now listed below just before project 33
Summative 8 - Screen Casting
Create an account on Screencast-o-matic and do 30 seconds demonstrating how to do a specific feature in PhotoShop. Be sure to start your screencast off by saying your first and last name aloud into the microphone and speak loudly and clearly enough so that you are easily heard and understood. Email your project to [email protected].
Business Promotional Materials
For this unit, download a free Logo Design app (such as LogoScopic Studio - Logo Maker or Makr - Logo Design & Custom Prints) onto your iPad. Create a customized logo for an existing South Portland Business. The logo must contain a graphic image, business name, address (use 123 Main Street, South Portland, ME 04106) and telephone (use 555-123-4567). Save the image and email it to yourself to use for projects 27, 28, 29, and 30.
Project 25 - Create a company logo
Use Photoshop to open the image you created on your iPad with the logo design app. Save as project 25 in jpg format and then upload into your shared Digital Graphics folder for grading.
Project 26 - Curb Appeal
You have been hired to redesign the landscape of this home to give it better curb appeal so that they have a stronger chance of selling the home. Download this image and add flowers, shrubs, etc. to landscape this home to make increase its appeal and value to potential home buyers. Be realistic in your proportions as well as the way the light is hitting your plants to make it look realistic (don't have sunny flowers showing up in a shaded yard). Save as project 26 in jpg format and then upload into your shared Digital Graphics folder for grading.
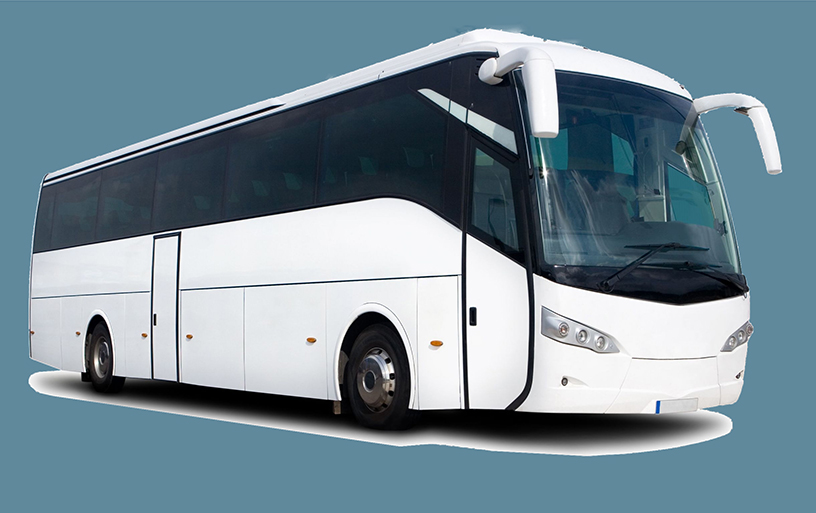
Project 27 - Bus Advertising
Use this white bus Mr. Hunter has placed onto this website and place a product advertisement for a local South Portland business on one side panels and door of the bus (Do not put your image onto the front of the bus or above the passenger windows). Be sure to adjust the opacity of your ad so that it does not eliminate the actual shape and contour of the bus (experiment with Edit, Paste Special, Paste Into and adjusting the opacity slider). Save as project 27 in jpg format and then upload into your shared Digital Graphics folder for grading.
Project 28 - Create a business card
Mr. Hunter will walk you through the steps of using your logo (project 27) to create business cards using a MS Word template. Save as project 28 in Word format and upload into your shared Digital Graphics folder for grading.
Project 29 - Create a business letterhead - (optional project)
Mr. Hunter will walk you through the steps of using your logo (project 27) to create letterhead using a MS Word template. Save as project 29 in Word format and upload into your shared Digital Graphics folder for grading.
Project 30 - Create a website navigational menu
Mr. Hunter will walk you through the process of creating a website navigational menu. The menu will contain your company logo and the following links: Home Products Search Email About Us Save for web and devices as project 30 (html and images) and then upload the folder it creates into your shared Digital Graphics folder for grading.
Project 31 - Retro Advertising
Create an advertisement for an electronic devise (cell phone, laptop, tablet, etc.) using fonts and images from the 1920's - 1960's). Search through the existing fonts installed on your computer to determine if you already have an appropriate font installed. If you do not, go to dafont.com or 1001freefonts and select and appropriate font to install. Use filters, make sure to include appropriate text and layout, and set the file size as 8 x 10. This project is ALL about mimicking a professional looking design and style! Spend time on the layout!! Go here for some project ideas. Save as project 31 in jpg format and then upload into your shared Digital Graphics folder for grading.
Project 32 - Product Wrapper
Select one of the following products and create a new spoofed label or wrapper for a can of soda, a bottle of water, a candy bar, a can of soup, or a box of cereal. The wrapper should be printable and contain all the information necessary for the product. Consider: name, ingredients, etc. Save as project 32 in jpg format and then upload into your shared Digital Graphics folder for grading.
Summative Project 9 - Advertisement
Create an advertisement for your business to promote a special sale to be held December 18 and 19, 2015. Your advertisement must be 5" wide x 7" tall. Use a sans serif font (must be any shade of red, green, or blue) for your headline to grab your reader's attention and a serif font for the body of the message (must not be red, green, or blue). Apply a border around your ad using a complimentary color to match the headline. Save as Summative 9 in jpg format and then upload into your shared Digital Graphics folder for grading.
Advanced Photography and Image Editing Techniques
Project 24 - All Dressed Up
For this project, you will be opening a full body image of yourself and then dressing yourself using one of the paperdoll outfits shared with you through Mr. Hunter's shared Google Drive folder. You will need to experiment with filters to your selfie image to make it appear that you were a colored drawing to match how the clothing images appear. Save as project 24 in jpg format and then upload into your shared Digital Graphics folder for grading.
Project 33- Panoramic Photo
For this project, we will be standing outside taking photographs of the school. You will need to take 7-9 photos with the iPad and then uploading them into your Dropbox or email them to yourself so you may then access them in Photoshop. To take photos, stand in a comfortable position with your body turned toward the left, elbows locked toward your chest to stabilize each photo that you take. Snap a photo, move your upper torso slightly to the right and snap another photo ... move your torso again toward the right and take another photo ... repeat this until you have at 7-9 photos. You will then import the photos to your computer and then Mr. Hunter will go through the process of using an automation feature of creating a real panoramic photo. Once Photoshop has stitched the images together, resize and crop so that the image has a resolution of 75, a height of 3" and a width of 7." Save as Project 33 in jpg format and then upload into your shared Digital Graphics folder for grading.
Project 34 - Photo Bomb
Download an image containing a group of people. Add your own image into the existing photo so that it appears that you were there with them. Make sure to adjust lighting, shadows, contrast, etc. and the layer containing your inserted image to make your image look to be realistic. Save as Project 34 in jpg format and then upload into your shared Digital Graphics folder for grading.
Project 35 - Professional Photographer
Use your iPad to take 4-5 poses to use as a portrait photo of a classmate. Have the classmate select which photo they wish for you to edit to correct any flaws such as blemishes, wrinkles, lighting, etc. Be sure to keep the image resolution the same as when you took it so that they photos may be printed at a later time. Save as Project 35 in jpg format and then upload both the original and new version into your shared Digital Graphics folder for grading. NOTE: You do NOT have permission to send the photos you took of your classmate to anyone else.
Project 36 - Minion (optional challenge project)
Turn yourself into a minion after watching this tutorial. The images you will need are shared with you in Mr. Hunter's Google Drive folder. Save as Project 36 in jpg format and then upload into your shared Digital Graphics folder for grading.
Summative Project 10 - Darwin
Download two animal images from the Internet (select ones that are "large" resolution" and create your own new animal by using various features from each animal. Add a text layer above the image giving a new name to the creature you have created. You will want to define a pattern from one of the two original animals to use to blend areas of the second animal into your finished image. Your finished project should be 5" x 7" (or 7" x 5"). Save as Summative 10 in jpg format and then upload into your shared Digital Graphics folder for grading.
iPad Image Design and Manipulation
Project 37 - Flowing Photo (iPad App)
Download the Flowing Photo app from the App Store. Our class will be going outside as a group to take some photos outside. Make sure that at least 3 of your photos contain areas that contain both the high school building with sky above with some clouds. Your task will be to animate the clouds in your best photo to simulate movement. After you are happy with the results of your project, press the "i" in the top left portion of your iPad, select SAVE. Select "i" again from the top left corner and select SHARE, click MAIL, and email the project to Mr. Hunter at [email protected] Flowing Photo will then generate an animated GIF.
Project 38 - PicCollage (optional challenge project)
Download the free PicCollage App from the App Store. Project details to follow soon. Save as Project 39 and then share from your ipad to [email protected]. Use Project 39 as the subject.
Final Exam Projects - we will take the final exam on Thursday, January 28.
Font Selection
Mr. Hunter will provide each student with three words. You will type each of your three words using a font which represents the context of the term. Select from fonts already installed on your computer .... if you do not have a font to match the term, go to dafont or 1001freefonts and download and install a matching font. Your image will be 4" tall by 5" wide with a resolution of 75. Use a background color of your choice and type each term in a different complimentary color. Save as Font Selection in jpg format and then upload into your Google Final Exam folder for grading.
Understanding Layers
Download the layers.psd image from Mr. Hunter's Google Drive folder. In your layers panel, rename each layer to reflect the name of the search engine. Next arrange the layers alphabetically (A-Z) so that Altavista is the first layer listed and Yahoo is the last layer listed. Next turn off the Onekey, AOL, and Ask.com layers (by clicking eyeball). Save as New Layers in psd format and then upload into your Google Final Exam folder for grading.
Damaged Photo
Download the Damaged Photo.jpg image from Mr. Hunter's Google Drive folder. Change the image mode to RGB and then repair and imperfections (scratches, tears, creases, etc.). Once this is completed, you will be painting only the skin on her face. Be sure to use a realistic skin tone. Save as Repaired and Colored in jpg format and then upload into your Google Final Exam folder for grading.
Making You A Star!
Create a new movie poster from scratch (don't just put yourself into an existing one) from the selection of movies shown below. The image must be 8" x 10" with a resolution of 100. Be sure to add the title of the movie (be creative and make it stand out using a blending affect of your choice). Add an additional text layer which includes the names of the primary actors and actresses (be sure to include your name in this list). Please keep in mind that weapons and the use of drugs and/or alcohol may not be included in your project. For this project you must have yourself as one of the characters in the movie poster. These special affect tutorials relating to movie posters may help you to come up with an incredible project: Tutorial 1 and Tutorial 2 Save as movie poster in PSD format and then upload into your FINAL EXAM folder for grading. Please select from one of the following movies:
At the completion of the exam, please delete all of your data files from the computer after you have verified that that appear in Infinite Campus as being graded.
SPECIAL NON-GRADED PROJECTS
Adobe Slate
Watch this video overview before beginning. Adobe Slate is a free iPad app which allows you to tell a story with images. You will be able to add text and buttons to tell your story. For this project you will ...
Printing on Wood
Details to follow.
3D Printing
Go here and read the overview of 3D printing and then create a project of your choice to be printed on a 3D printer. Show your project to Mr. Hunter for approval and he will then arrange for the object to be printed. Please keep in mind that the object should be no larger than 5" x 5"
Last updated January 22 2016
NOTE: All Photoshop projects should be saved as a JPG with a resolution of 75 dpi unless otherwise noted.
Advanced Painting Techniques
Project 17 - Face Painting
For this project, you will need to open an image of your own face. (Be sure that you are looking straight ahead in the photo. Copies of many of your face pictures have been shared with you in Google Drive for our course). Next you will need to download an image of a flag representing where you were born (it may be either a flag representing either the state or the country where you were born. Be sure that you download an image that is in "large" format. A tutorial for how to complete the project is shown here. Save as Project 17 in jpg format and then upload into your shared Digital Graphics folder for grading.
Project 18 - Water Color Painting
For this project, you will need to open an image you have taken with your iPad. Size the image to be 4" x 6" in landscape orientation with a resolution of 100. Apply the watercolor artistic filter. You will want to experiment with the brush detail, shadow intensity and texture values to get the best outcome for your project. Save as Project 18 in jpg format and then upload into your shared Digital Graphics folder for grading.
Summative 6 - Master Painter
Females in class - Download this painting of Mona Lisa and save it to your desktop. Males in class - download this painting of Thomas Jefferson. Next take a selfie which has you looking in the same direction and at approximately the same angle as the painting you just downloaded of Mona Lisa or Thomas Jefferson. Follow this tutorial to replace Mona Lisa or Thomas Jefferson's face with your own. Be sure to adjust the color, opacity, contrast, etc. of your face layer to match that shown in the painting. Next flatten your image and apply any texture found within the painting to your face. Save as Summative 6 in jpg format and then upload into your shared Digital Graphics folder for grading.
Advanced Transformation and Animation Techniques
Project 19 - Warp Text
For this project, you will be typing both your first and last name (as different layers) and then using the Warp Text tool to manipulate the shape of your text. Your completed project should have either a red, green, or blue background and a contrasting color used for your text. Steps to create your project will be found here. Save as Project 19 in jpg format upload into your shared Digital Graphics folder for grading.
Project 20 - Puppet
Watch this brief tutorial on how to do the Puppet Warp feature and then use these skills to make either your left or arm bend into a different direction in your photo. For this project, have a classmate take a full body photo of you with your iPad. You will need to have both of your arms extended as if you were reaching toward 3 and 9 o'clock. Have them email you the photo and then open it up in Photoshop. Create a new file with a white background and then copy only your face and body from your photo and paste onto this one background layer. You are now ready to complete the steps shown in the video. Once completed, save as Project 20 in jpg format and then upload into your shared Digital Graphics folder for grading.
Project 21 - Speaker
Follow the steps that Mr. Hunter demonstrated to create a vibrating stereo speaker. Save this file and open it in Photoshop. When completed, select File, Save for Web & Devices, leave as a GIF and save as project 21 and be sure to select "images" not "html and images" and then upload into your shared Digital Graphics folder for grading.
Project 22 - Holiday Greeting Card with Liquify
Use Photoshop to open a face image of yourself. (You should be looking directly at the camera). The image should be 5" wide x 7" tall. You will be using the liquify effect to turn yourself into a holiday elf - give yourself pointed ears (if your ears show in the photo), large eyes, a pointed chin, and any other liquify effect of your choice. Save and then add a Christmas or other holiday-related hat to the top of your head. Add an appropropriate holiday greeting to the front and save as project 22 in jpg format and then upload into your shared Digital Graphics folder for grading.
Summative 7- Buzzing Around
Download this field of tulips and open it up with Photoshop. Next download this bee image and open it up in Photoshop. Copy the bee image and paste it to location 1 shown below. You will be using the animation window to move the bee to different portions of the tulip image based on your grade here at school.
Gr 12: Have the bee move from 1 to 2 to 3 to 1
Gr 11: Have the bee move from 1 to 3 to 4 to 1
Gr 10: Have the bee move from 1 to 4 to 1 to 2
Gr 9: Have the bee move from 1 to 4 to 2 to 3
Use the following timings when moving to these numbered flowers: 1 =.01 sec 2 = .02 sec 3 = .02 sec 4 = .02 sec
Be sure to select the file to loop forever. Save for Web & Devices as Summative 7 and then upload into your shared Digital Graphics folder for grading.
Editing Video
Project 23 - Making You A Star (optional challenge project)
This project will require that you be logged into your computer to use the Apple operating system (Not Windows). For this project, you will use your ipad to record 5 seconds of video footage walking between room 326 toward 351. You should avoid filming when anyone else is in the hallway and be sure to be quiet during filming. Send yourself the video footage (or open it from your Cloud account if you have images and video backed up there). Next you will need to have a classmate take a full body shot of yourself standing against a blank wall in the hallway to make it easier for the greenscreen process to work in iMovie. Send your full body shot to yourself and open it in Photoshop. Select the background (including the wall, ceiling, and floor and remove them with the magic eraser. (You will end up having a gray and white checkerboard appearing). Fill the checkerboard background with either green (R=0, G=255, B=0) or blue (R=0, G=0, B=255). Save your full body image to the computer so that you may import it into your video clip in iMovie. The iMovie tutorial demonstrating how to do this project is found here. Save your completed video as project 23 (from within iMovie - medium quality) and then upload into your shared Digital Graphics folder for grading.
Project 24 - is now listed below just before project 33
Summative 8 - Screen Casting
Create an account on Screencast-o-matic and do 30 seconds demonstrating how to do a specific feature in PhotoShop. Be sure to start your screencast off by saying your first and last name aloud into the microphone and speak loudly and clearly enough so that you are easily heard and understood. Email your project to [email protected].
Business Promotional Materials
For this unit, download a free Logo Design app (such as LogoScopic Studio - Logo Maker or Makr - Logo Design & Custom Prints) onto your iPad. Create a customized logo for an existing South Portland Business. The logo must contain a graphic image, business name, address (use 123 Main Street, South Portland, ME 04106) and telephone (use 555-123-4567). Save the image and email it to yourself to use for projects 27, 28, 29, and 30.
Project 25 - Create a company logo
Use Photoshop to open the image you created on your iPad with the logo design app. Save as project 25 in jpg format and then upload into your shared Digital Graphics folder for grading.
Project 26 - Curb Appeal
You have been hired to redesign the landscape of this home to give it better curb appeal so that they have a stronger chance of selling the home. Download this image and add flowers, shrubs, etc. to landscape this home to make increase its appeal and value to potential home buyers. Be realistic in your proportions as well as the way the light is hitting your plants to make it look realistic (don't have sunny flowers showing up in a shaded yard). Save as project 26 in jpg format and then upload into your shared Digital Graphics folder for grading.
Project 27 - Bus Advertising
Use this white bus Mr. Hunter has placed onto this website and place a product advertisement for a local South Portland business on one side panels and door of the bus (Do not put your image onto the front of the bus or above the passenger windows). Be sure to adjust the opacity of your ad so that it does not eliminate the actual shape and contour of the bus (experiment with Edit, Paste Special, Paste Into and adjusting the opacity slider). Save as project 27 in jpg format and then upload into your shared Digital Graphics folder for grading.
Project 28 - Create a business card
Mr. Hunter will walk you through the steps of using your logo (project 27) to create business cards using a MS Word template. Save as project 28 in Word format and upload into your shared Digital Graphics folder for grading.
Project 29 - Create a business letterhead - (optional project)
Mr. Hunter will walk you through the steps of using your logo (project 27) to create letterhead using a MS Word template. Save as project 29 in Word format and upload into your shared Digital Graphics folder for grading.
Project 30 - Create a website navigational menu
Mr. Hunter will walk you through the process of creating a website navigational menu. The menu will contain your company logo and the following links: Home Products Search Email About Us Save for web and devices as project 30 (html and images) and then upload the folder it creates into your shared Digital Graphics folder for grading.
Project 31 - Retro Advertising
Create an advertisement for an electronic devise (cell phone, laptop, tablet, etc.) using fonts and images from the 1920's - 1960's). Search through the existing fonts installed on your computer to determine if you already have an appropriate font installed. If you do not, go to dafont.com or 1001freefonts and select and appropriate font to install. Use filters, make sure to include appropriate text and layout, and set the file size as 8 x 10. This project is ALL about mimicking a professional looking design and style! Spend time on the layout!! Go here for some project ideas. Save as project 31 in jpg format and then upload into your shared Digital Graphics folder for grading.
Project 32 - Product Wrapper
Select one of the following products and create a new spoofed label or wrapper for a can of soda, a bottle of water, a candy bar, a can of soup, or a box of cereal. The wrapper should be printable and contain all the information necessary for the product. Consider: name, ingredients, etc. Save as project 32 in jpg format and then upload into your shared Digital Graphics folder for grading.
Summative Project 9 - Advertisement
Create an advertisement for your business to promote a special sale to be held December 18 and 19, 2015. Your advertisement must be 5" wide x 7" tall. Use a sans serif font (must be any shade of red, green, or blue) for your headline to grab your reader's attention and a serif font for the body of the message (must not be red, green, or blue). Apply a border around your ad using a complimentary color to match the headline. Save as Summative 9 in jpg format and then upload into your shared Digital Graphics folder for grading.
Advanced Photography and Image Editing Techniques
Project 24 - All Dressed Up
For this project, you will be opening a full body image of yourself and then dressing yourself using one of the paperdoll outfits shared with you through Mr. Hunter's shared Google Drive folder. You will need to experiment with filters to your selfie image to make it appear that you were a colored drawing to match how the clothing images appear. Save as project 24 in jpg format and then upload into your shared Digital Graphics folder for grading.
Project 33- Panoramic Photo
For this project, we will be standing outside taking photographs of the school. You will need to take 7-9 photos with the iPad and then uploading them into your Dropbox or email them to yourself so you may then access them in Photoshop. To take photos, stand in a comfortable position with your body turned toward the left, elbows locked toward your chest to stabilize each photo that you take. Snap a photo, move your upper torso slightly to the right and snap another photo ... move your torso again toward the right and take another photo ... repeat this until you have at 7-9 photos. You will then import the photos to your computer and then Mr. Hunter will go through the process of using an automation feature of creating a real panoramic photo. Once Photoshop has stitched the images together, resize and crop so that the image has a resolution of 75, a height of 3" and a width of 7." Save as Project 33 in jpg format and then upload into your shared Digital Graphics folder for grading.
Project 34 - Photo Bomb
Download an image containing a group of people. Add your own image into the existing photo so that it appears that you were there with them. Make sure to adjust lighting, shadows, contrast, etc. and the layer containing your inserted image to make your image look to be realistic. Save as Project 34 in jpg format and then upload into your shared Digital Graphics folder for grading.
Project 35 - Professional Photographer
Use your iPad to take 4-5 poses to use as a portrait photo of a classmate. Have the classmate select which photo they wish for you to edit to correct any flaws such as blemishes, wrinkles, lighting, etc. Be sure to keep the image resolution the same as when you took it so that they photos may be printed at a later time. Save as Project 35 in jpg format and then upload both the original and new version into your shared Digital Graphics folder for grading. NOTE: You do NOT have permission to send the photos you took of your classmate to anyone else.
Project 36 - Minion (optional challenge project)
Turn yourself into a minion after watching this tutorial. The images you will need are shared with you in Mr. Hunter's Google Drive folder. Save as Project 36 in jpg format and then upload into your shared Digital Graphics folder for grading.
Summative Project 10 - Darwin
Download two animal images from the Internet (select ones that are "large" resolution" and create your own new animal by using various features from each animal. Add a text layer above the image giving a new name to the creature you have created. You will want to define a pattern from one of the two original animals to use to blend areas of the second animal into your finished image. Your finished project should be 5" x 7" (or 7" x 5"). Save as Summative 10 in jpg format and then upload into your shared Digital Graphics folder for grading.
iPad Image Design and Manipulation
Project 37 - Flowing Photo (iPad App)
Download the Flowing Photo app from the App Store. Our class will be going outside as a group to take some photos outside. Make sure that at least 3 of your photos contain areas that contain both the high school building with sky above with some clouds. Your task will be to animate the clouds in your best photo to simulate movement. After you are happy with the results of your project, press the "i" in the top left portion of your iPad, select SAVE. Select "i" again from the top left corner and select SHARE, click MAIL, and email the project to Mr. Hunter at [email protected] Flowing Photo will then generate an animated GIF.
Project 38 - PicCollage (optional challenge project)
Download the free PicCollage App from the App Store. Project details to follow soon. Save as Project 39 and then share from your ipad to [email protected]. Use Project 39 as the subject.
Final Exam Projects - we will take the final exam on Thursday, January 28.
Font Selection
Mr. Hunter will provide each student with three words. You will type each of your three words using a font which represents the context of the term. Select from fonts already installed on your computer .... if you do not have a font to match the term, go to dafont or 1001freefonts and download and install a matching font. Your image will be 4" tall by 5" wide with a resolution of 75. Use a background color of your choice and type each term in a different complimentary color. Save as Font Selection in jpg format and then upload into your Google Final Exam folder for grading.
Understanding Layers
Download the layers.psd image from Mr. Hunter's Google Drive folder. In your layers panel, rename each layer to reflect the name of the search engine. Next arrange the layers alphabetically (A-Z) so that Altavista is the first layer listed and Yahoo is the last layer listed. Next turn off the Onekey, AOL, and Ask.com layers (by clicking eyeball). Save as New Layers in psd format and then upload into your Google Final Exam folder for grading.
Damaged Photo
Download the Damaged Photo.jpg image from Mr. Hunter's Google Drive folder. Change the image mode to RGB and then repair and imperfections (scratches, tears, creases, etc.). Once this is completed, you will be painting only the skin on her face. Be sure to use a realistic skin tone. Save as Repaired and Colored in jpg format and then upload into your Google Final Exam folder for grading.
Making You A Star!
Create a new movie poster from scratch (don't just put yourself into an existing one) from the selection of movies shown below. The image must be 8" x 10" with a resolution of 100. Be sure to add the title of the movie (be creative and make it stand out using a blending affect of your choice). Add an additional text layer which includes the names of the primary actors and actresses (be sure to include your name in this list). Please keep in mind that weapons and the use of drugs and/or alcohol may not be included in your project. For this project you must have yourself as one of the characters in the movie poster. These special affect tutorials relating to movie posters may help you to come up with an incredible project: Tutorial 1 and Tutorial 2 Save as movie poster in PSD format and then upload into your FINAL EXAM folder for grading. Please select from one of the following movies:
- Avengers: Age of Ultron
- Cinderella
- Inside Out
- Joy
- Mission Impossible – Rogue Nation
- Selma
- Star Wars: The Force Awakens
- The Martian
- Vacation
At the completion of the exam, please delete all of your data files from the computer after you have verified that that appear in Infinite Campus as being graded.
SPECIAL NON-GRADED PROJECTS
Adobe Slate
Watch this video overview before beginning. Adobe Slate is a free iPad app which allows you to tell a story with images. You will be able to add text and buttons to tell your story. For this project you will ...
Printing on Wood
Details to follow.
3D Printing
Go here and read the overview of 3D printing and then create a project of your choice to be printed on a 3D printer. Show your project to Mr. Hunter for approval and he will then arrange for the object to be printed. Please keep in mind that the object should be no larger than 5" x 5"
Last updated January 22 2016
